In here’s a full walkthrough for A Lively Haunt adventure game consisting of solutions to all the main puzzles in the game.
Released by Kevin McConnell, A Lively Haunt is an adventure game with Stylized art style. It’s a text parser adventure and old school game whose gameplay begins with two stranded travellers.
Are you bold enough to enter A Lively Haunt alone or must you join a friend to investigate this 2-player? Find out in this A lively Hunt Walkthrough below.
A Lively Haunt Complete Walkthrough
Check out this comprehensive A Lively Haunt Complete Walkthrough;
Part 1: On the Road
Once the opening cutscene is complete, “Release car hood”
Then, “Open car door”
Next, “Get out of car”
Stand near the front hood and, “Open car hood”
Then, “Check engine”
The player still in the car should now, “Open door”
And, “Get out”Approach the hood and, “Open hood”
Head 2 screens east to the iron gate in the brick wall
Have both players, “Sneak through gate” or, “Slip between bars”
Head 2 screens north, 1 west, and 1 more north to a playground
Have one player, “Sit on swing”
While the other player should, “Sit on seesaw”
Specifically on the eastern end of the seesaw, closer to the house
The player on the swing must press the left and right arrow keys alternately to swing the swing
Once their swing arc seems to be maxed out, “Jump off swing” right at the upper right end of the arc
They will jump off, landing on the seesaw, and catapulting the other player through the open second floor window
Part 2: In the House
“Stand up”Approach the wardrobe in the northeast corner and, “Open wardrobe”
“Take key”
Head to the large crate to the southeast and, “Unlock padlock”
Once that’s done, “Take chain”
Now go to the radiator against the western wall, near the window you entered through
“Tie chain to radiator”
Get a bit closer to the coiled chain and, “Pick up chain”
“Throw chain out window”
Once it’s done tumbling, you can, “Get off swing”
Walk to the bottom of the chain and, “Climb chain”
Once back inside, get both players near the large crate and have them both, “Pull crate” simultaneously
Hold the left arrow key to slide the crate, it will stop automatically when it’s moved far enough
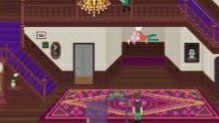
Go east out the newly-revealed door to the front entry hall
Part 3: Restoring Power

From the entry hall, on the 2nd floor, head immediately north
You should be in a short corridor with 2 doorways and a lot of black space
Go through the western door and approach the desk in the southwestern corner, avoiding the bed
“Open desk drawer”
And, “Take tape”
Return to the entry hall and head to the door on the ground floor with the light visible beneath it
“Open door” and walk through, which should take you to the basement
Head down the stairs and into the flooded area
You should be able to see a drain in the middle of the floor
The player not holding the roll of tape should approach it and, “Clear drain”
Then go to the workbench to the west and, “Take wrench”
Go to the leaky pipe in the northwest corner and attempt to, “Fix leak”
After that, go to the barrels in the southeast corner and, “Take pipe”
Now return to the leaky pipe and, “Slide pipe over wrench”
Now just, “Fix leak”
With the flood water gone, have the player holding the tape approach the circuit breaker in the northeast corner and, “Mend wire”
“Open breaker”
“Use breaker”
Now flick every breaker switch to the right, except the one labelled Library
Press the big red button near the top, then the white X in the top right corner
Part 4: Bathroom, Bedroom, Ballroom
Return to the front entry hall, and go north to a zig-zagging corridor, then east to the kitchen
“Take toaster”
Head south to a dining room, then approach the southwestern door and, “Unlock door”
“Open door”Pass through back into the entry hall
Now go back upstairs and east to a corridor with green and gold wallpaper
Have one player walk east until it triggers the suit of armor to attack, then immediately turn back west and walk along the middle of the long red rug
The other player must wait until the armor is walking on the rug, then “Yank rug”
Once the armor has fallen, walk to the door in the north wall and, “Open door”
Pass through into a bathroom
Position yourself near the bathtub and, “Open shower curtain”
Move the player with the toaster near the electrical outlet in the north wall and, “Plug in toaster”
Then, “Throw toaster in tub”
Now return to wherever you left the padlock that was holding the chain to the large crate
If you never moved it, it should still be in the 2nd floor eastern storage room, where you first entered the building“
Take padlock”
Go back to the corridor with the armor and head east to a short hallway with 3 doors
With the player holding the padlock, approach the southern-most door and, “Crouch”
The other player should also approach and then, “Get boost”
Once you’re boosted up, “Open transom window”
And, “Climb through transom”
The player with the padlock should enter the newly-accessed room and, “Lock trunk” that’s against the north wall
Now approach the lamp to the east and, “Unscrew lightbulb”
Return to the entry hall, go north to the zig-zag corridor and, “Open door” near the double doors
Go through to the ballroom“
Play piano”
Use the arrow keys to flip the sheet music until Peppy Jalopy is selected
Use keys A through L to play the piano and perform a duet of Peppy Jalopy perfectly
If this sequence proves too infuriating, simply turn the Allow Skill-Based Skip toggle on in the options menu, then sit at the piano again to be given the option to skip it
Either way, now head to the keypad in the north wall and, “Unscrew lightbulb”
Then using the player carrying the U.V. bulb from the 2nd floor bedroom, “Screw in lightbulb”
“Look at keypad”
In the U.V. light, three fingerprints should be visible on the number buttons
The passcode consists of these three marked numbers, pressed once each
You may need to experiment a bit to discover the proper order, but since there are only 6 possible combinations, it shouldn’t take too long
For example, a passcode consisting of 1, 2 and 3 could only be: 123, 132, 213, 231, 312, or 321
Once you’ve deduced the passcode, you can, “Open door” to the north
Part 5: The Hanged Man
In the front entry hall, approach the front door and, “Unlock door”
Then, “Open door”Head 2 screens south and 1 screen west to an area with a well and a man hanging from a tall tree
Approach the tall tree and, “Take knife”
While holding the knife, “Climb tree” that it was jabbed in
Move the other player next to the well and ready them to, “Catch corpse” but don’t actually hit enter yet
Have the player in the tree, “Cut rope”As soon as the rope is cut and the hanged man begins to fall, the player below can, “Catch corpse”
The moment that’s done, have the player on the branch, “Climb down tree”
Once they’re down, approach the player half-in the well, and they will automatically assist them
After the corpse is pulled up you can, “Search corpse” to find a yellow keycardIf the rope snapped while trying to pull the hanged man up, or he otherwise found his way into the well, do not panic, simply check part 6 of this guide
Part 6: The Hanged Man (Alternate Method)
If the hanged man somehow wound up at the bottom of the well, you can still get to him, it’s just a little more complicated
Continue playing the game normally until you can enter and exit the house as you please
Now get the chain that was tied around the large crate in the 2nd floor storage room
If it’s still tied around the radiator, you will need to, “Pull chain up”
“Untie chain”And, “Take chain”With the chain, return to the well area where the hanged man was
“Tie chain to tree” specifically the tall tree he was initially hanging from
“Pick up chain”
And, “Throw chain into well”
Approach the well and, “Climb down well”
In the well, use the up and down arrow keys to climb the chain
You may notice one brick that stands out, about halfway down
Get near that brick and, “Kick brick”
Now climb down as far as you can go and, “Let go of chain”
Get near the hanged man and, “Search body” to find a yellow keycard
Now, “Push brick”
“Tilt brick”
And, “Stand on brick
From here you can, “Jump to chain”
Just continue holding the up arrow until you’ve climbed out of the well
With the other player, approach the tall tree and, “Untie chain
If you can’t seem to type fast enough before the well woman pops out, just keep trying, as the amount of time she takes to appear increases by a bit with each attempt
Part 7: Attic, Lab, and Out
Head back to the bathroom
“Search body” in the tub to find a blue keycard
With each player carrying a keycard, go to the ballroom and through the north door to the library
Go through the northern door here
If a metal shutter keeps closing and won’t let you through, return to the basement and flick the library circuit breaker switch
In the room north of the library, position each player near the keycard readers and, “Slide keycard through reader”
Make sure the yellow keycard is being used on the left, and the blue keycard on the right
You can have both players, “Drop keycard”
Through the door that just opened, approach the table just to the east and, “Take screwdriver”
Now leave and return to the corridor just before the bathroom, with the suit of armor in it
Have the player without the screwdriver stand beneath the attic door and, “Crouch”
The player with the screwdriver should now, “Get boost” near the crouching player
Once boosted they can, “Unscrew screws”
“Open attic door”
And, “Get down”
“Drop screwdriver”
The crouching player can, “Stand”And, “Climb ladder” to the attic
Approach the northern window and, “Open Window”
Then, “Climb out window”
On the ledge outside, press the left and right arrow keys to sidle along
If the player starts to fall, press and hold the up arrow key to regain balance
Inch close, but not too close, to the jumper
Wait for them to jump, then quickly go past before they come back up
Go all the way east and, “Turn satellite dish”
Once you have ahold of it, use the left and right arrow keys to rotate the dish
Turn it until the little blinking yellow light on the left is extinguished, and the solid green light on the right is illuminated
In photosensitive mode, the green light will be accompanied by a short beep
“Let go of dish”
Now just sidle back past the jumper to the open window
Once back in the attic, a figure under a sheet will attack
In the southeastern portion of the attic are 2 small holes in the floor that denote rotten floorboards
Move around these holes, making sure not to step on them yourself, and wait for the sheeted figure to walk over them, at which point they will fall through
You can now leave the attic via, “Climb ladder”
Return to the laboratory and approach the yellow screen on the northern wall
“Look at console”
This is another sequence you can skip with the Allow Skill-Based Skip toggle in the options menu
Otherwise, tap and hold the KEY button on the console to input Morse code signals
Short taps make dits, longer presses make dahs
The post-its to the left tell you what combination of dits and dahs make which letters
Key in the word, “SESAME” (3 dits, 1 dit, 3 dits, 1 dit + 1 dah, 2 dahs, and 1 dit)You should get a message telling you a hatch was unlocked
Press the X in the upper right corner and head back to the ballroom and out the southern door to the zig-zag corridor
A bear should appear, head south into the den / lounge
Head east into the entry hall, and immediately book it for the eastern door to the dining room
Go north to the kitchen and approach the blue rug to the east
“Roll up rug”
“Open hatch”
And, “Climb ladder”
Part 8: Subterranean Tunnel
Have whichever player is laying down, “Stand up”
Go through the semi-visible door in the north wall
Approach stationary bike and, “Ride bike”
This is another sequence that can be skipped with the Allow Skill-Based Skip toggle in the options menu
Have the player not riding the bike exit the room south and go 1 screen eastIn 2-player mode, the player on the bike will now have to press the arrow keys in clockwise order (up, right, down, left, up, etc.) to pedal the bike and power the lights
In 1-player mode, the A.I. controlled player will do their best to keep the lights on, but will grow fatigued the longer they pedal
Either way, the on-foot player will have to pass through a winding tunnel and sneak past 4 enemies undetected
To pass the first woman, simply hug the right wall, go up, and head right as soon as you can, without getting too close to her
For the man in the hardhat and high-vis vest, simply wait until he’s in the upper passage, heading east toward the water heater, and then go south down passage leading to the cages
To get by the woman in the wheelchair, stay out of her line of sight, and hide below the crates while she’s in the upper horizontal passage, then hide to the right of them when she’s in the vertical passage
The headless man can be avoided by standing in the small side-areas to the right and left of the passage he walks up and down, as he cannot detect you when you’re in them
Once you successfully navigate through the tunnel, go through the northeasterly door and then head west
At the end of the corridor, “Unlock door”
“Open door”
Go through, back into the room with the stationary bike
Have the other player, “Get off bike”
Return north to the corridor and go all the way east to escape the tunnels
Part 9: On the Road Again
Once outside, go 1 screen east and 2 screens south
Now just head east until you get to a bus station
“Open door” to the bus station and go through
Inside, head 1 screen east
Approach the small gate with the no-humans sign by the counter and, “Open gate”
Behind the counter, go to the door in the northwest corner and, “Open door”
Go through to a garage type area
Head to the eastern half of the garage and approach the yellow lever by the chain
“Pull lever”
Then, “Pull chain”Now, “Tie chain to lever”
Go back west and get near the bus’ rear doors and, “Open bus doors”
Now simply enter the bus, walk 1 screen east, and you have finished the game.
Concluding
So that that’s it on A Lively Haunt adventure complete walkthrough with solutions to all the main puzzles in the game.